Cesbo Astra and TVHeadend Deployment
- Created: 2024-12-18 10:24
- Updated: 2025-05-16 20:03
SAT>IP vTuners for Cesbo Astra
Steps to Deploy Cesbo Astra SAT>IP vTuners using our AutoDeploy Script
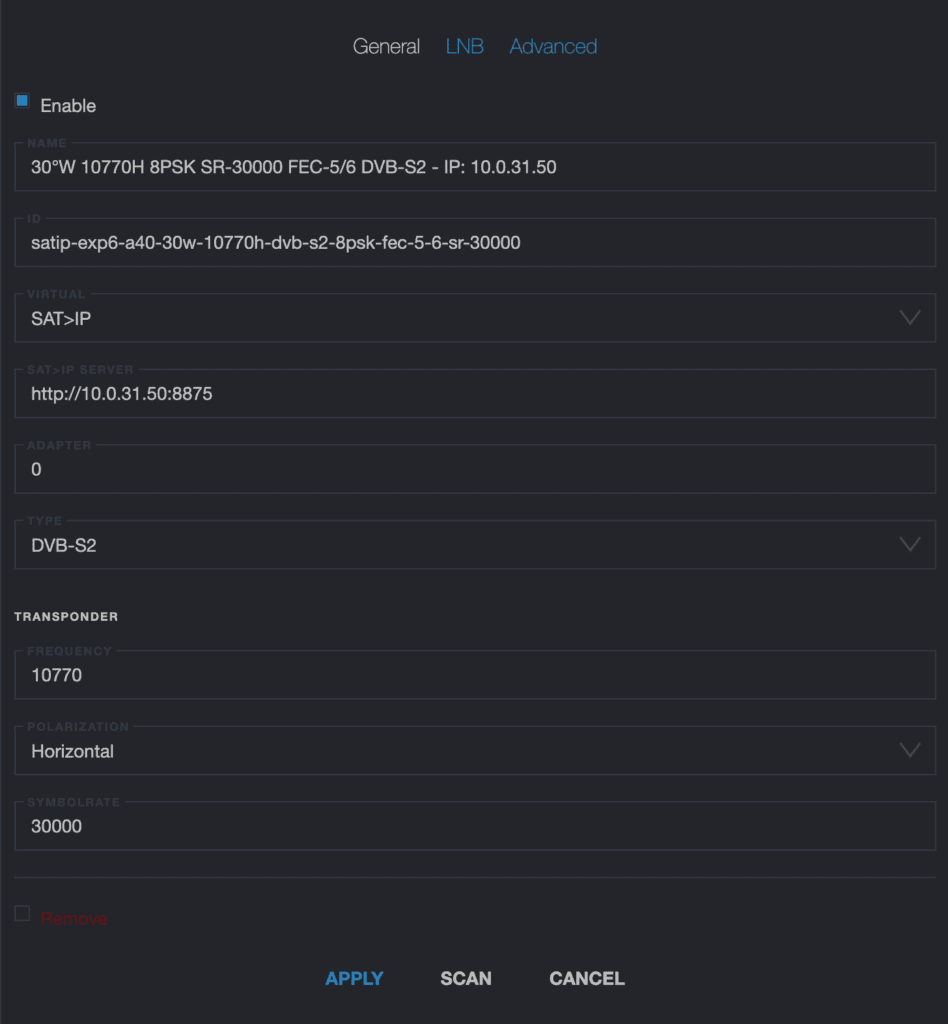
SAT>IP vTuner Example: 30°W 10770H 8PSK SR-30000 FEC-5/6 DVB-S2 – IP: 10.0.31.50
1. Prepare the Environment
Log in to your server as root and update system:
sudo su -
apt update && apt upgrade -y && apt install wget
2. Download and Run the AutoDeploy Script
Execute the following command to deploy Cesbo Astra with SAT>IP tuner support:
wget -qO- https://satline.tv/tools/satip-client-software-deploy.sh | bash3. Choose the SAT>IP Client Software
Example Configuration for SAT>IP vTuner: 30°W 10770H 8PSK SR-30000 FEC-5/6 DVB-S2 – IP: 10.0.31.50
- SAT>IP vTuner IP: 10.0.31.50
- Orbital Position: 30°W
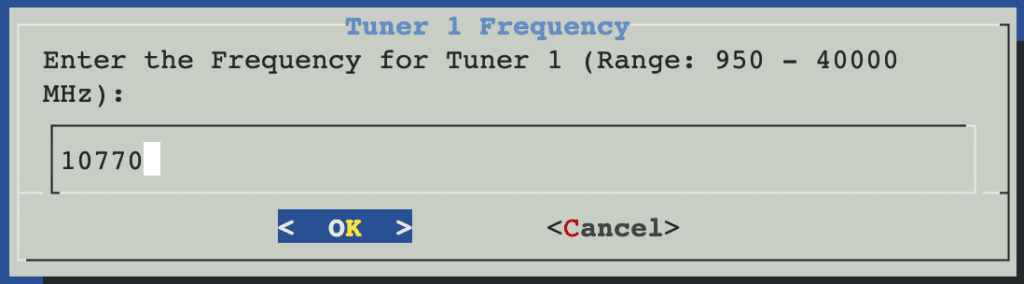
- Frequency: 10770
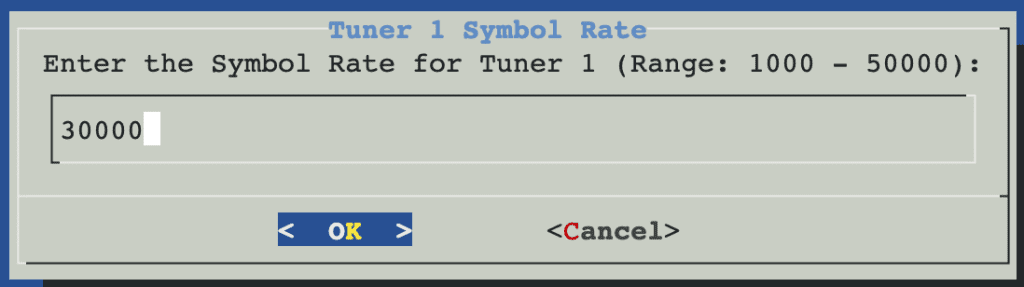
- Symbol Rate: 30000
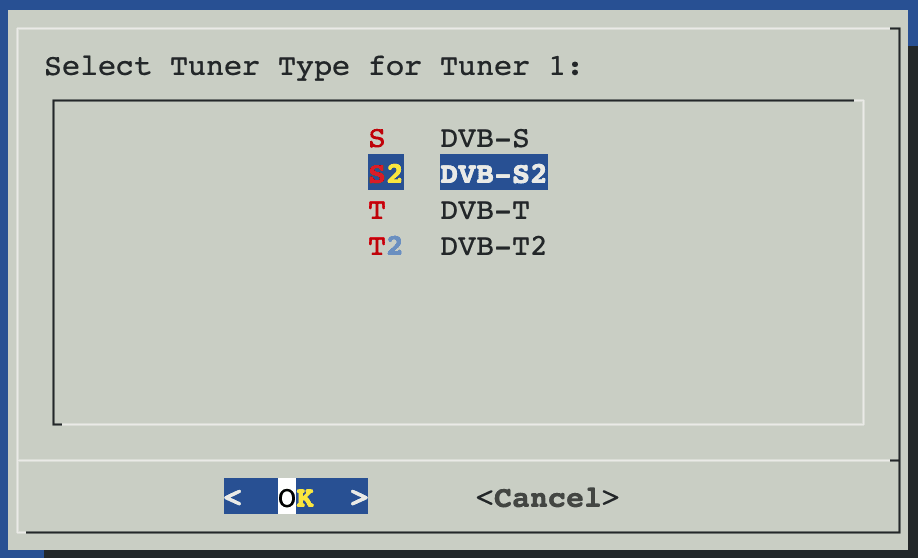
- Tuner Type: DVB-S2
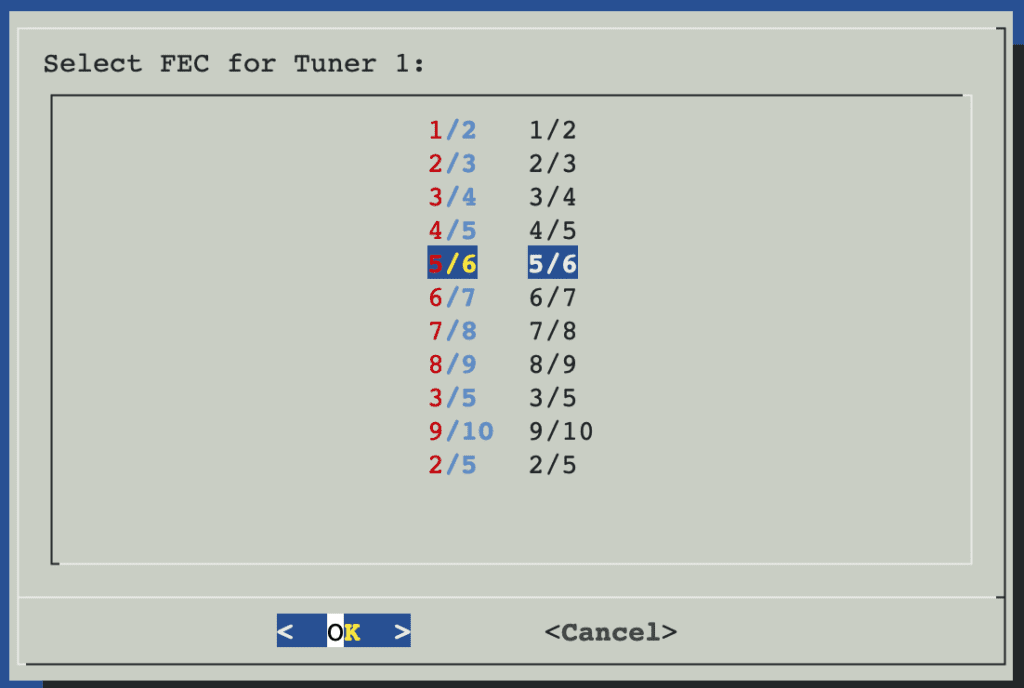
- FEC: 5/6
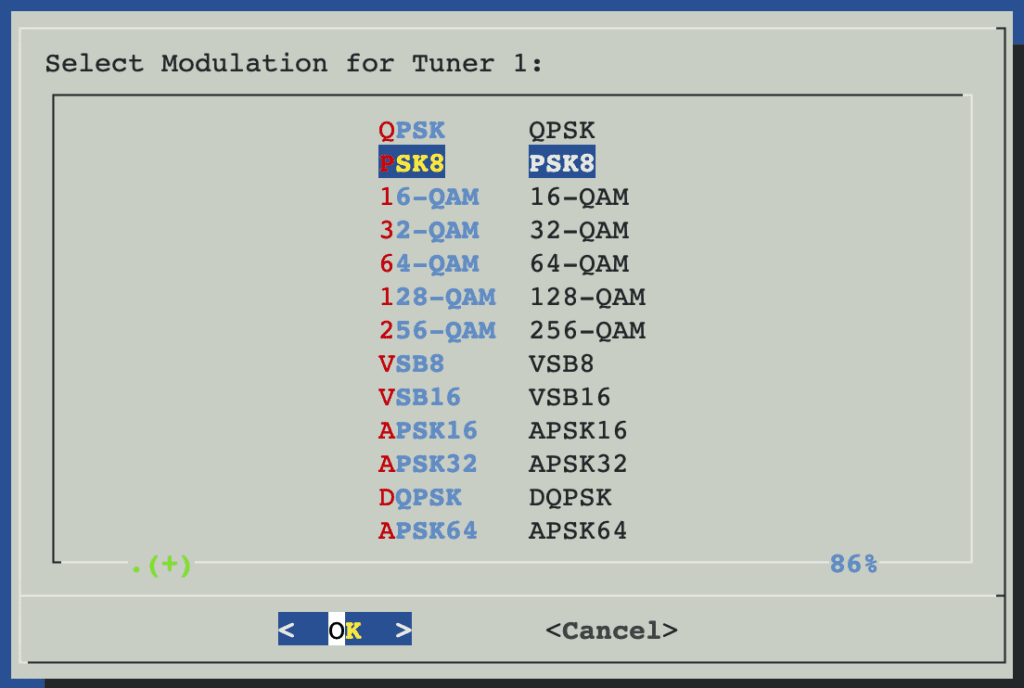
- Modulation: 8PSK
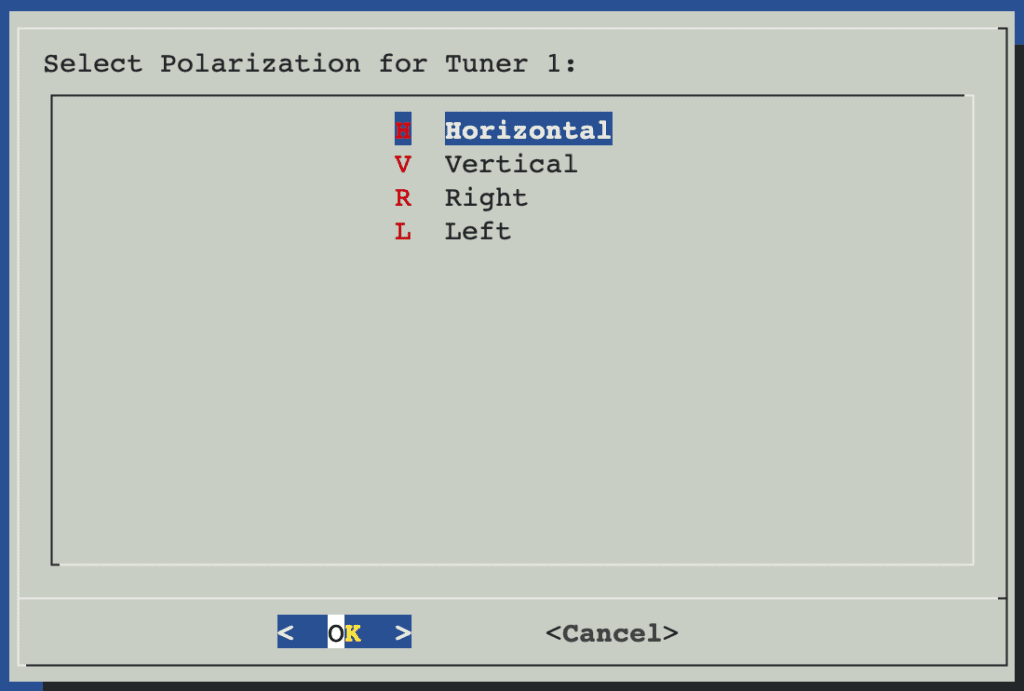
- Polarization: Horizontal (H)
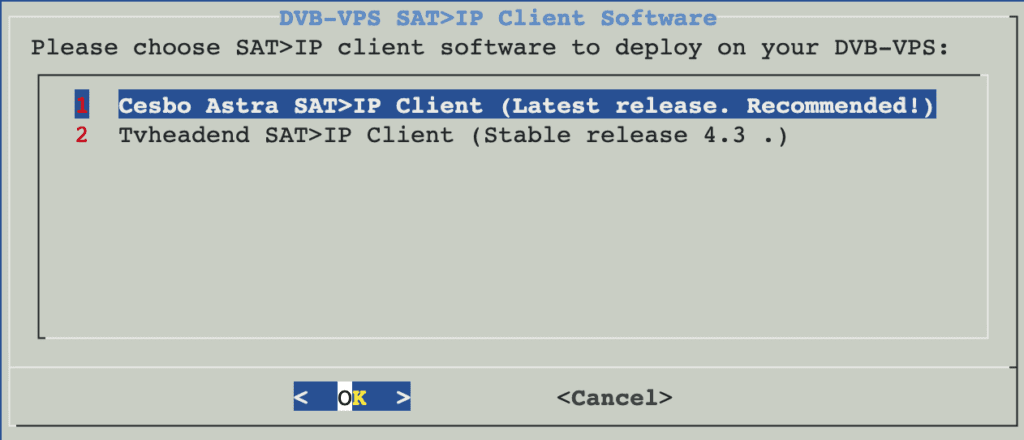
1. Select the appropriate SAT>IP client software: Cesbo Astra SAT>IP Client (Latest release. Recommended!)
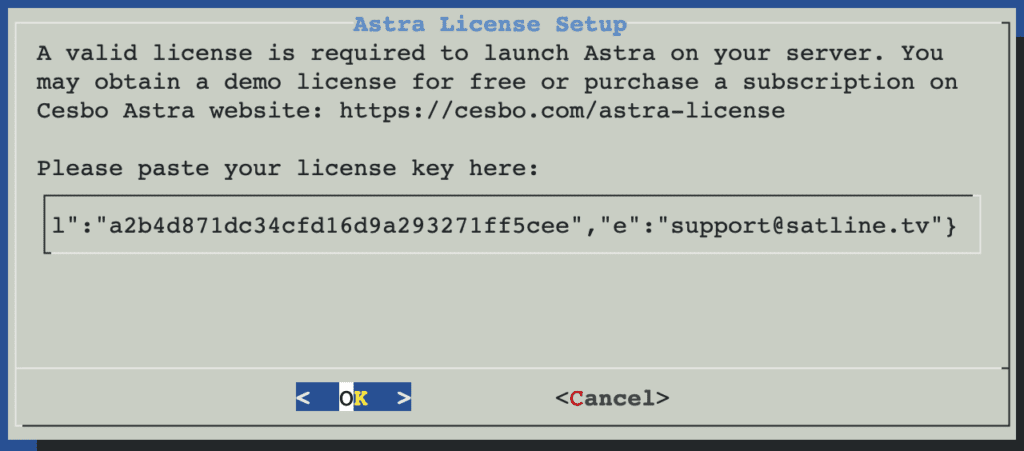
2. Add a valid license for Astra on your server.
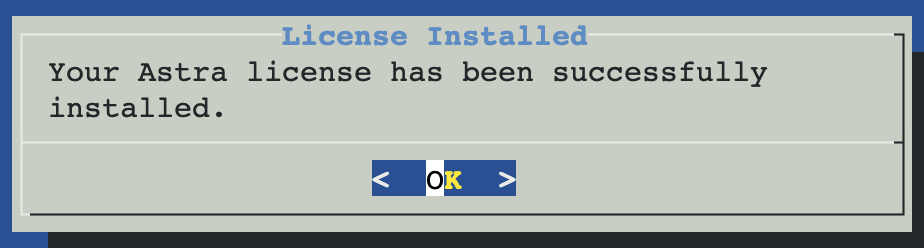
If your license is correctly added, you will see a confirmation dialog window.
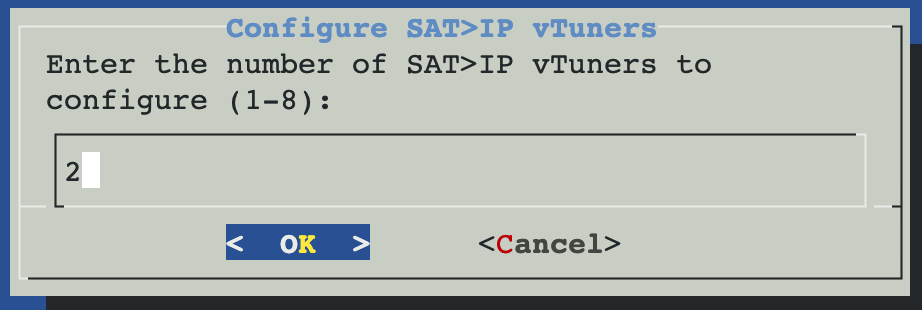
3. Configure SAT>IP Tuners.
1. Enter the number of SAT>IP Tuners to configure (1-8)
2. Tuner 1 Frequency: Enter the frequency for Tuner 1 (Range: 950-40000 MHz).
3. Tuner 1 Symbol Rate: Enter the Symbol Rate for Tuner 1 (Range: 1000-50000).
4. Select the Tuner Type for Tuner 1.
5. Select the FEC for Tuner 1.
6. Select the Modulation for Tuner 1.
7. Select the Polarization for Tuner 1.
8. Astra has been successfully installed and started.
Access the Astra web interface at: http://your-server-address:8000
Default login and password are admin. Change the default password to secure your installation.
9. After logging into the Astra web interface, you will see the SAT>IP vTuner attached to Astra.
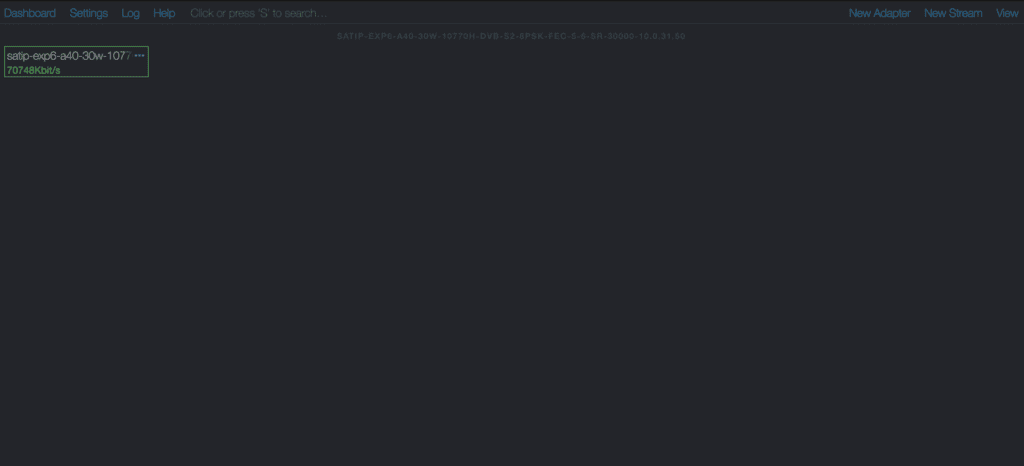
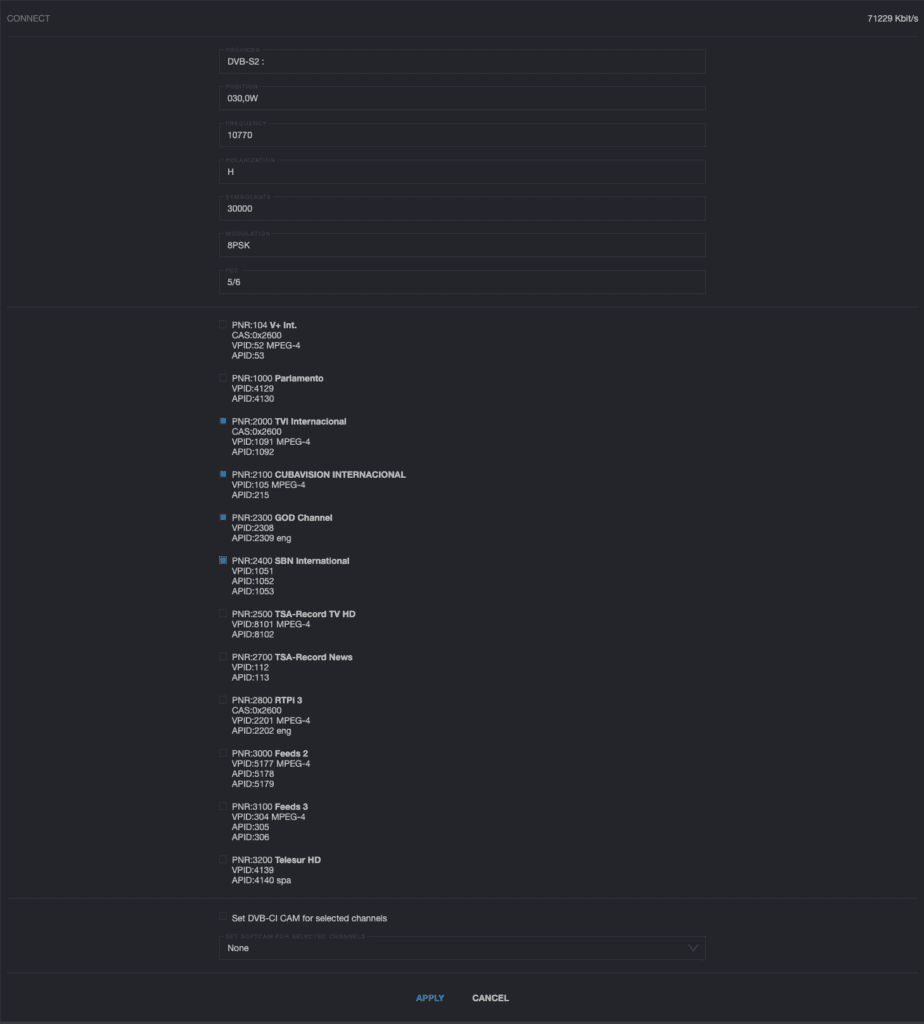
10. Click on the tuner icon, open the configuration window, and press the Scan button.
11. Select the channels you prefer and press Apply.

12. Done! Your channels are now ready for use.

For further information, refer to the https://help.cesbo.com/
Steps to Manually Add the SAT>IP vTuner to Cesbo Astra
1. Access the Astra web interface at: http://your-server-address:8000
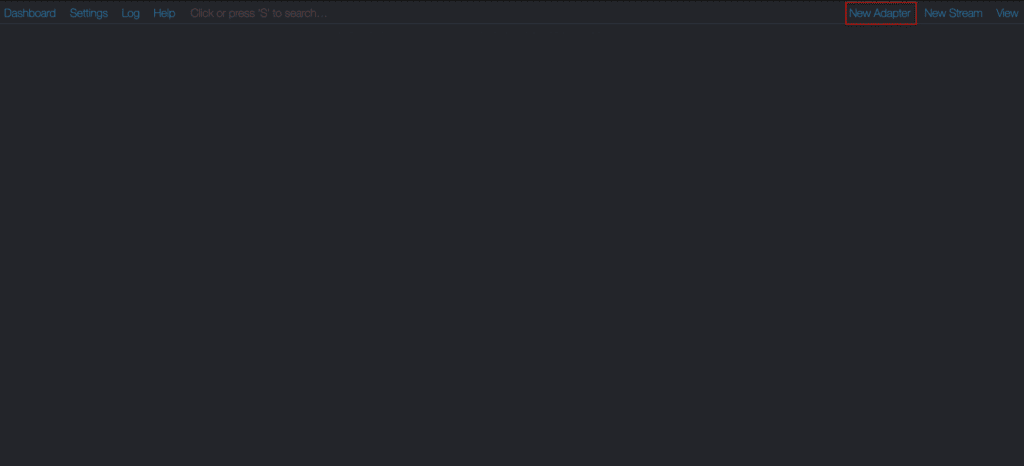
2. Navigate to the top-right corner and press the New Adapter button.
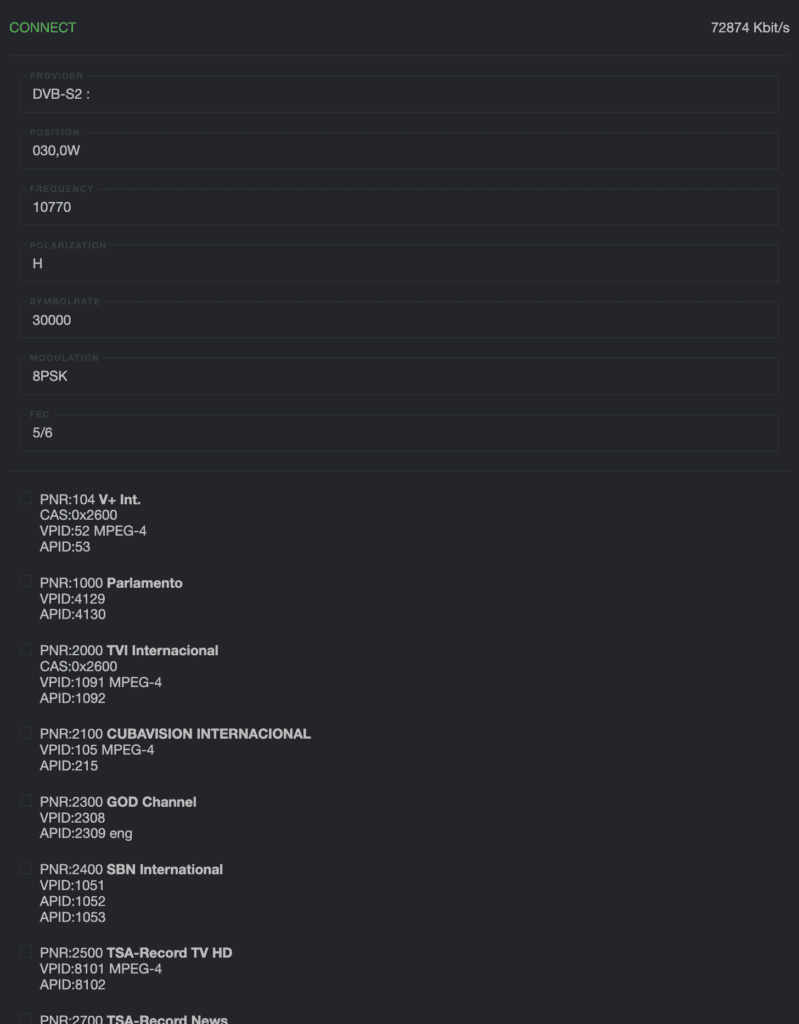
3. Enter all provided SAT>IP vTuner configuration details in the General tab.
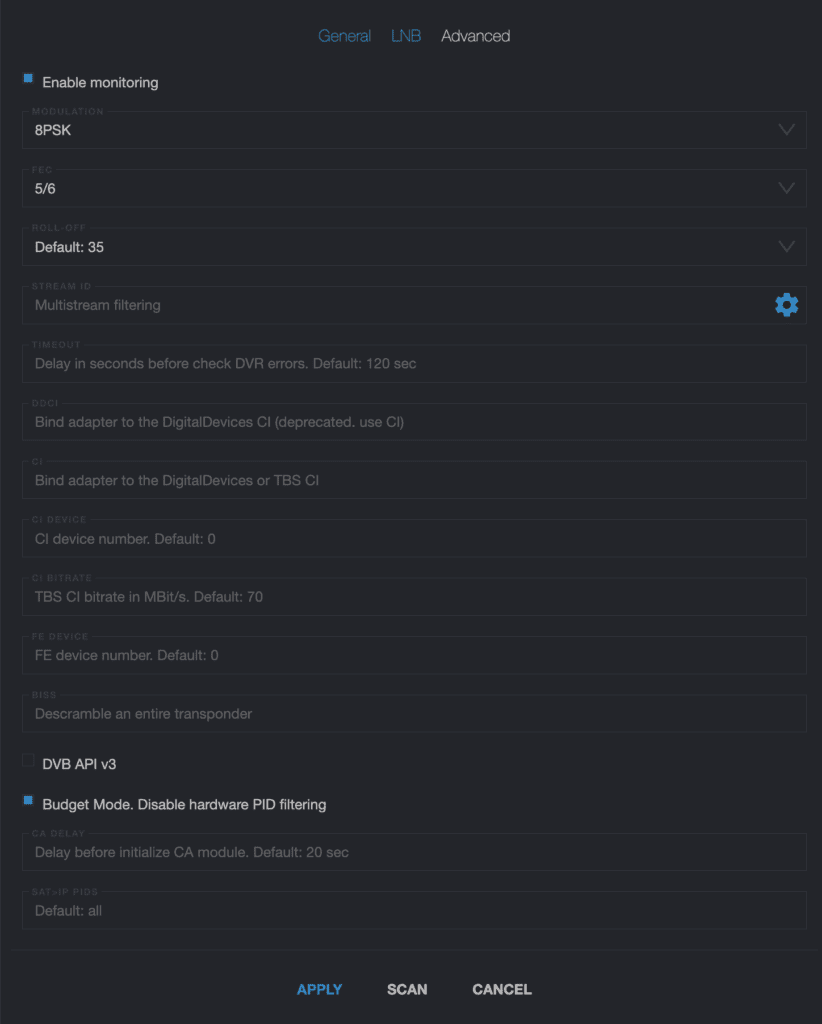
4. Enter all provided SAT>IP vTuner configuration details in the Advanced tab.
5. Scan for services by pressing the SCAN button.

6. Select the channels you prefer and press Apply.
7. Done! Your channels are now ready for use.

For further information, refer to the https://help.cesbo.com/ or contact our support team/
SAT>IP vTuners for TVHeadEnd
Steps how to deploy TVHeadEnd SAT>IP vTuners with our AutoDeploy Script.
1. Prepare the Environment
Log in to your server as root and update the system
apt update && apt upgrade -y && apt install wget2. Download and Run the AutoDeploy Script
Execute the following command to deploy TVHeadEnd with SAT>IP tuner support
wget -qO- https://satline.tv/tools/satip-client-software-deploy.sh | bash3. Choose the SAT>IP Client Software
Select the appropriate SAT>IP client software:
- TVHeadEnd Latest (4.3+)
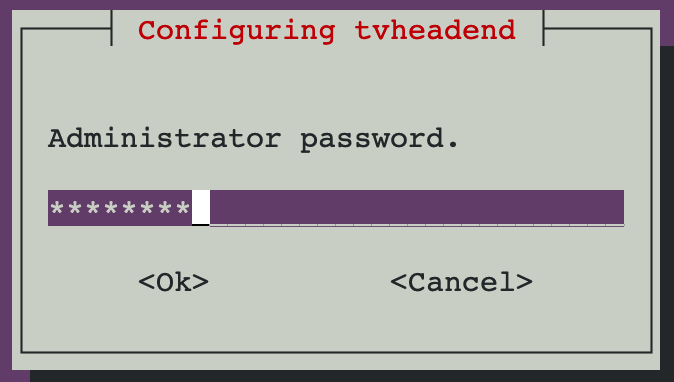
4. Set Up TVHeadEnd Administrator Credentials
Follow the dialog prompts to configure the administrator username.

Follow the dialog prompts to configure the administrator password.
5. Wait for the Configuration Dialog
Once TVHeadEnd is successfully installed, wait for the SAT>IP Tuners Configuration dialog.
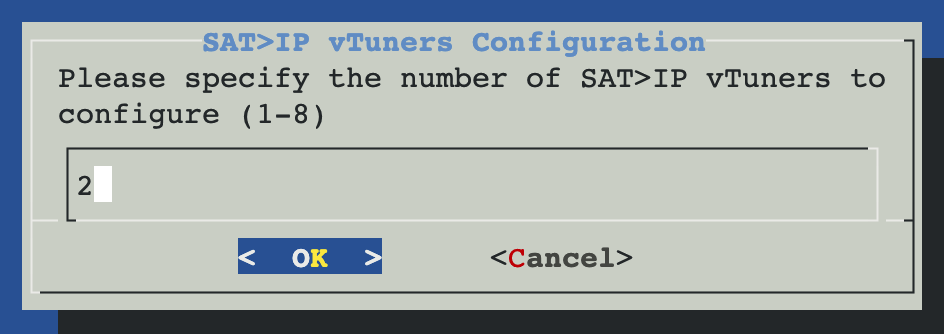
6. Configure the SAT>IP Tuners
1. Enter the number of tuners you wish to configure (1-8).
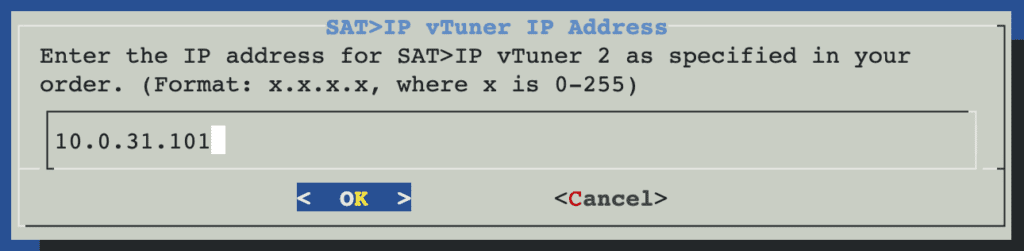
2. Input the IP addresses for the SAT>IP tuners (provided in your order email).
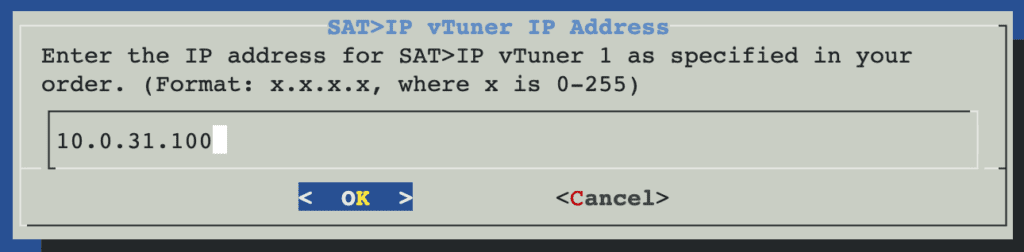
Follow this steps for all you SAT>IP tuners.
7. Confirm the Configuration
Review the tuner settings and confirm
-u hts -g video --satip_xml http://10.0.31.100:8875/satip.xml --satip_xml http://10.0.31.101:8875/satip.xml Press Yes if the configuration is correct.

8. Finalize the Setup
Once the configuration successfully updated you will see this window and press OK.

Access TVHeadEnd in your browser:
http://<your-server-ip>:9981Log in with the administrator credentials you created.
9. Set the Default View Level
Set the Default View Level to Expert in the TVHeadEnd web interface.

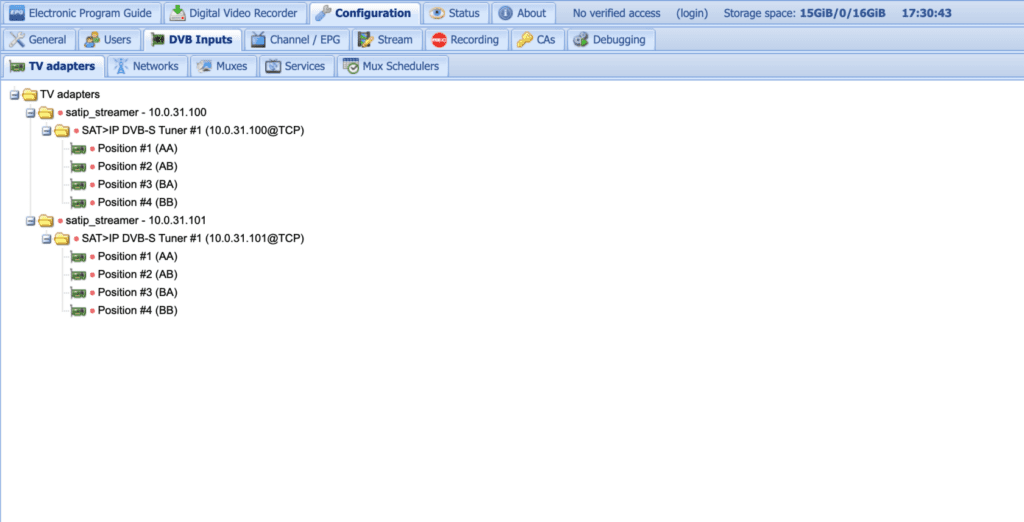
10. Change Tuner Delivery Mode
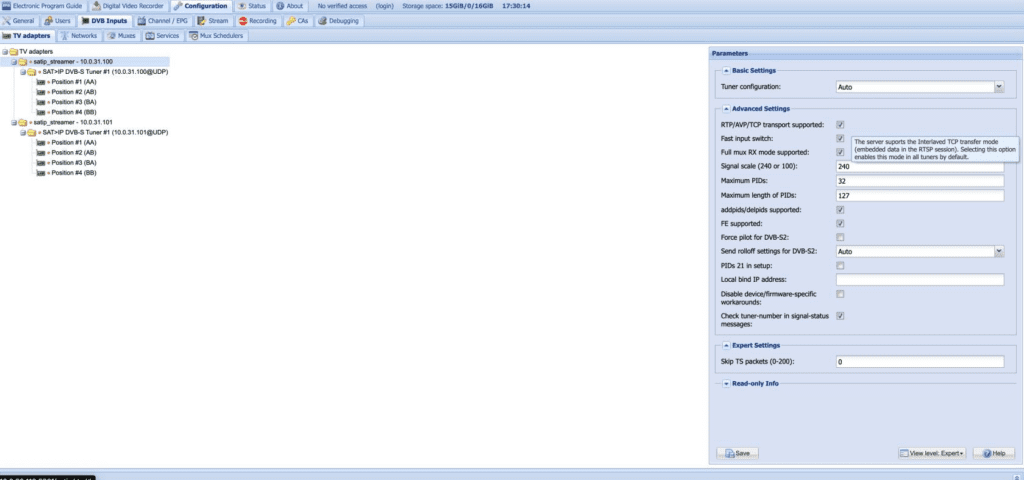
The tuners will now show as using TCP transfer mode (e.g., SAT>IP DVB-S Tuner #1 (10.0.31.100@TCP)).
11. Final Steps
Use the web interface to:
- Create Networks and Muxes.
- Bind tuners to networks.
- Scan for services and map channels.
- Download the playlist.
For further information, refer to the TVHeadEnd documentation.
Enjoy your private streaming!!!
Steps how to manually add the SAT>IP vTuner to TVHeadEnd
1. Locate the TVHeadEnd Configuration File
The configuration file is typically located at:/etc/default/tvheadend
2. Edit the Configuration File
Open the file using your preferred text editor with sudo privileges:
sudo nano /etc/default/tvheadend3. Add the SAT>IP Tuner Reference
- Locate the line starting with
OPTIONS=(or add it if it doesn’t exist). - Append the
--satip_xmloption with the SAT>IP server’s URL. For example: - OPTIONS=”-u hts -g video –satip_xml http://your-satip-tuner-ip:8875/satip.xml”
- If there are existing options, append
--satip_xmlto the current options, ensuring they are separated by spaces.
4. Save and Exit
Save your changes and exit the editor (e.g., in Nano, press CTRL+O to save and CTRL+X to exit).
5. Restart TVHeadEnd
Restart the TVHeadEnd service to apply changes:
sudo systemctl restart tvheadend6. Verify the Configuration
- Open the TVHeadEnd web interface in a browser:
http://<your-tvheadend-ip>:9981 - Navigate to Configuration > DVB Inputs > TV Adapters and confirm that the SAT>IP tuner is listed.
Notes:
- The SAT>IP XML URL (
http://your-satip-tuner-ip:8875/satip.xml) should point to the descriptor file generated by the SAT>IP server. This file contains tuner information and capabilities. - To configure multiple SAT>IP servers, add multiple
--satip_xmloptions separated by spaces: OPTIONS="-u hts -g video --satip_xml http://your-satip-tuner1-ip:8875/satip.xml --satip_xml http://your-satip-tuner2-ip:8875/satip.xml"
Enjoy Your Exclusive Streaming Experience!